
Capturing the Northern Lights in Germany: An Unexpected Spectacle
Learn how I photographed these green, purple, and perhaps red phenomena and understand what they are.
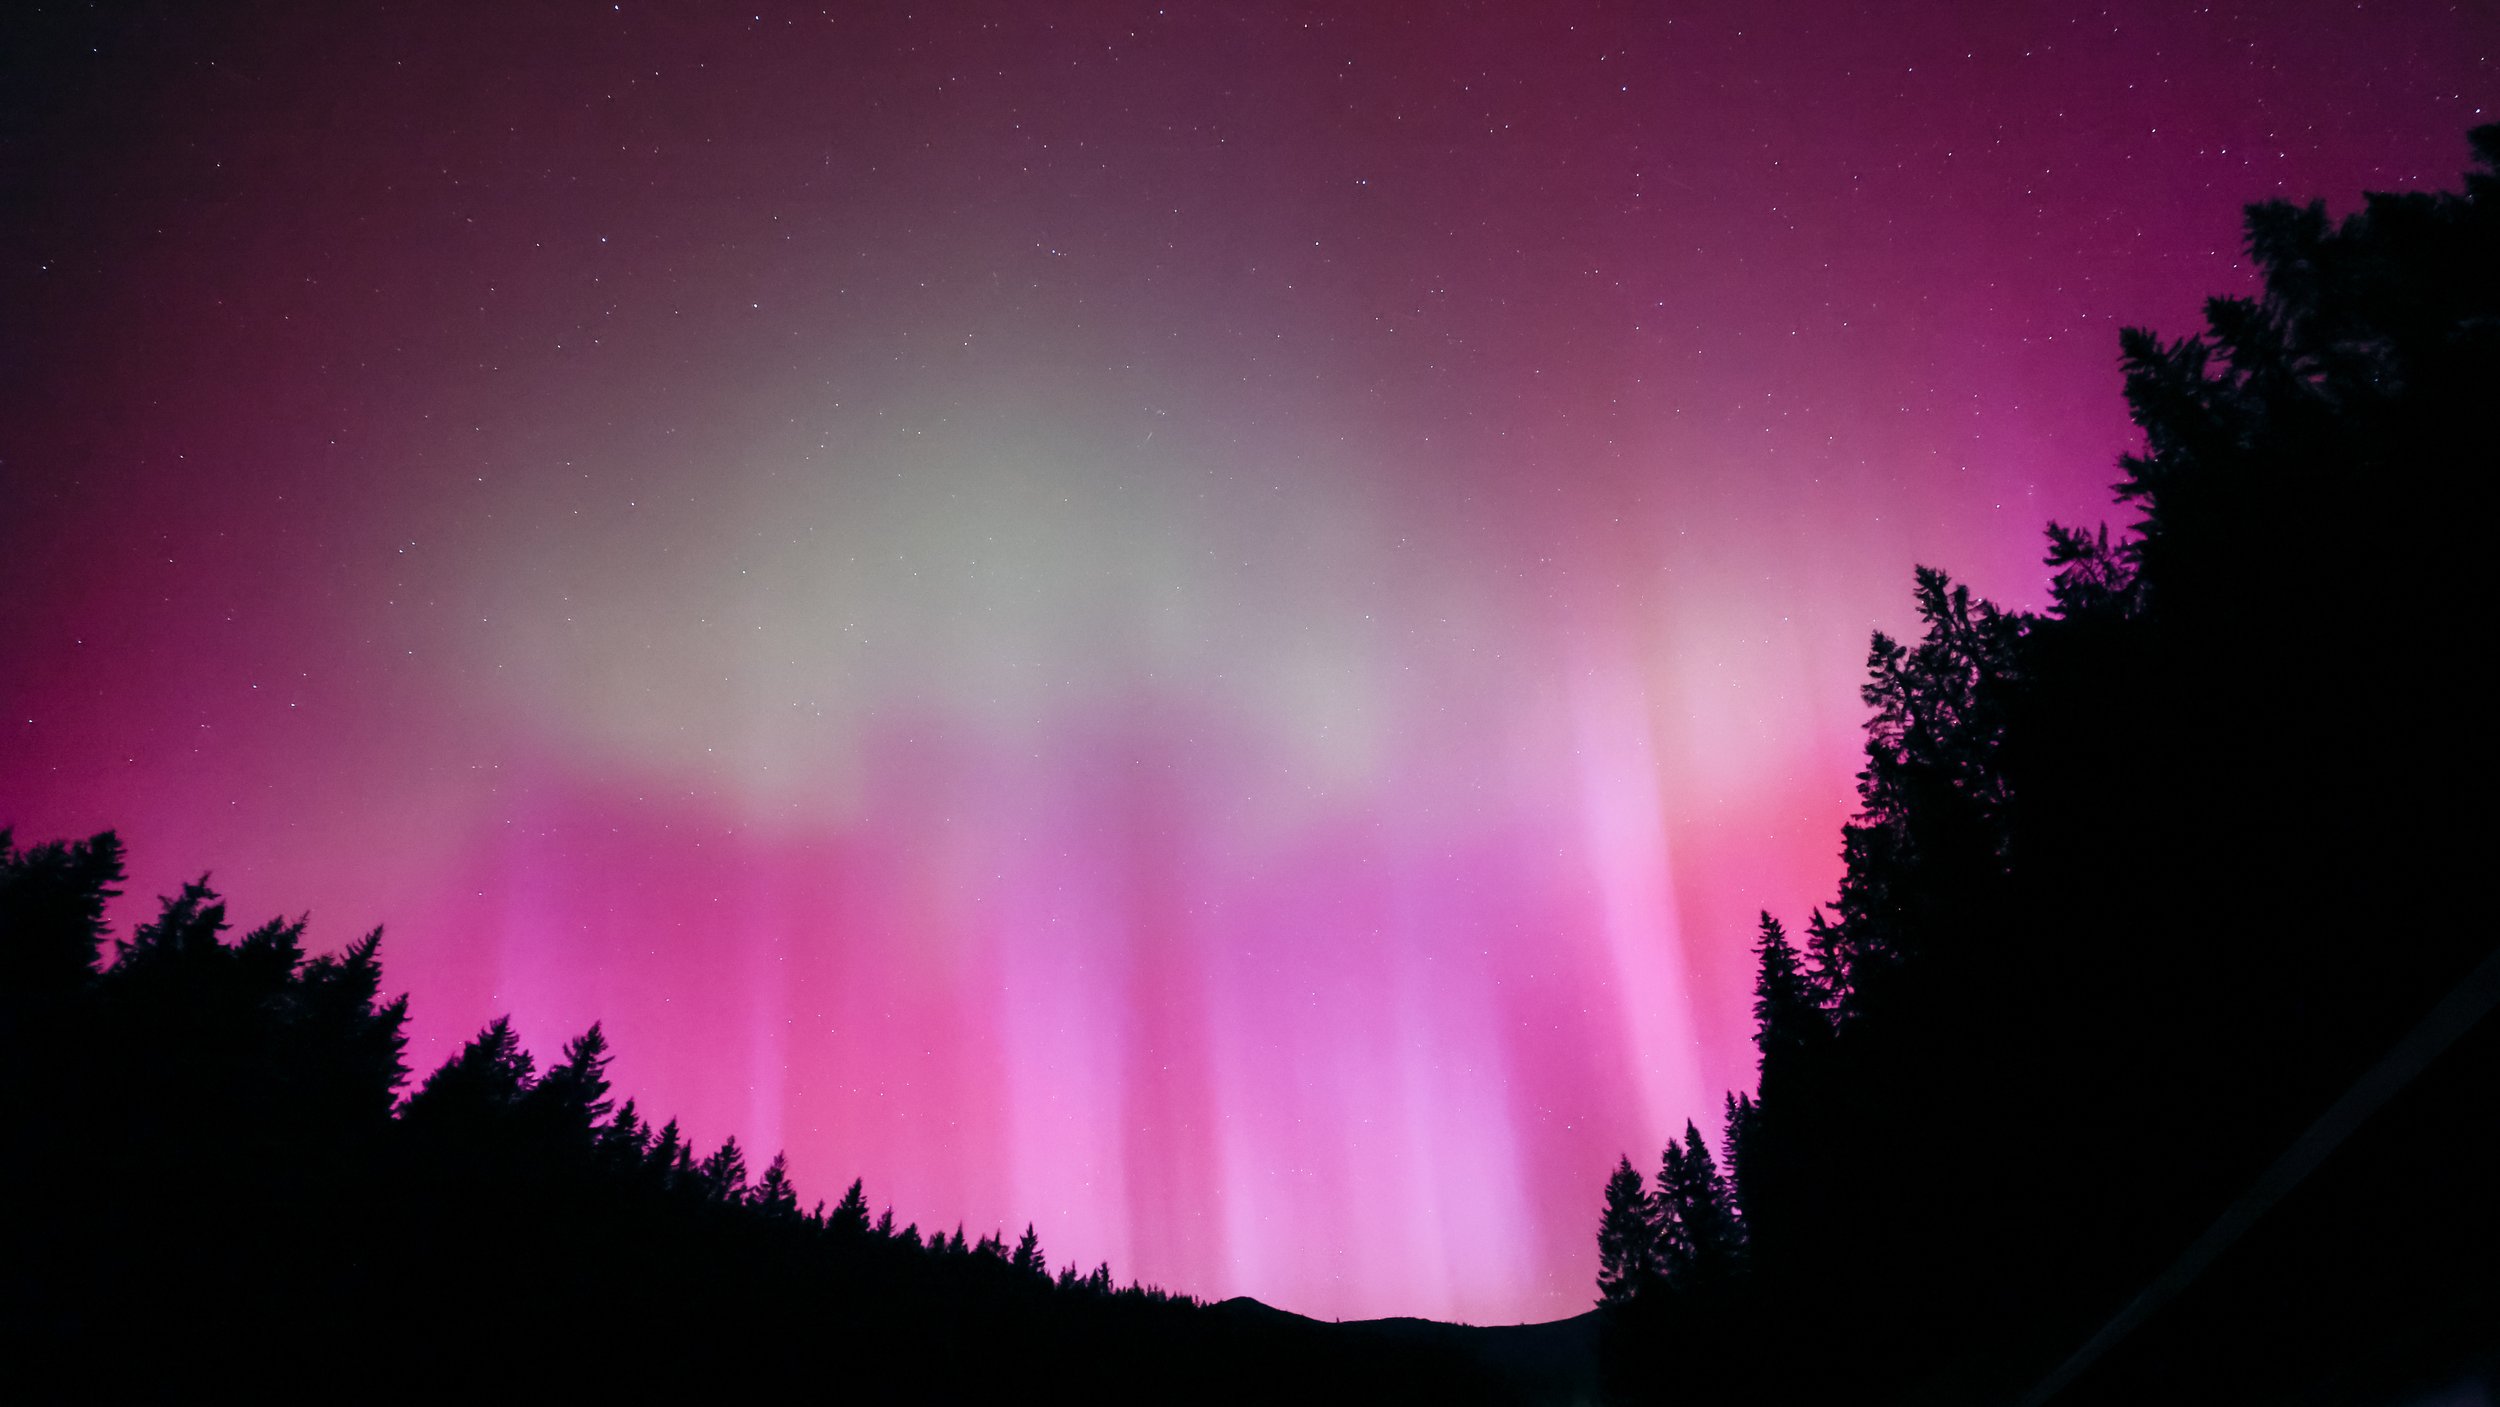
Northern Lights in Bavaria, Germany
The color of the northern lights is indicative of the presence of specific gases. Purple is caused by nitrogen, while the green color results from oxygen particles at approximately 60km (100 miles) in altitude.
Canon EOS R5 + Canon RF 15-35mm @15mm f/2.8 L IS/ ISO 6400 - f/2.8 - 2.5 sec
So there I was, on an ordinary day, deciding to take a spontaneous trip to the stunning Bavarian Alps for the weekend. My main goal wasn't to snap photos, but as any photographer knows, you never leave home without your gear. I had this idea of catching some gorgeous sunset shots and maybe doing a bit of quiet hiking.
As the night rolled on, we were having a blast playing beer pong and munching on some barbecue. But then, something straight-up bizarre happened at about 1 AM. We noticed the sky was turning a weird shade of purple. Shocked, we all started scrambling for our phones, and what we found online totally blew us away: everyone was talking about seeing the Northern Lights. People were posting about it from Italy, Germany, Denmark, and the UK.
Even though I was skeptical, I decided to check it out for myself – without my camera. And would you believe it? The Northern Lights were actually there, right above us. I sprinted back to the cabin, grabbed my camera, and got to work capturing this mind-blowing sight.
Throughout the whole thing, I was snapping photos and taking timelapses, all while wondering, "What on earth is going on? Why am I seeing the Northern Lights in Germany?". With my phone out of signal and a lousy wifi connection, I was cut off from the world. But hey, that didn't stop me from capturing this once-in-a-lifetime event, even if I was a bit baffled and taken aback.

Bavarian Alps
This was the location where I was staying at the time. I was fortunate to be in the right place at the right time with my camera.
Canon EOS R5 + Canon RF 100-500mm @100mm/ ISO 400 - f/6.3 - 1/800 sec
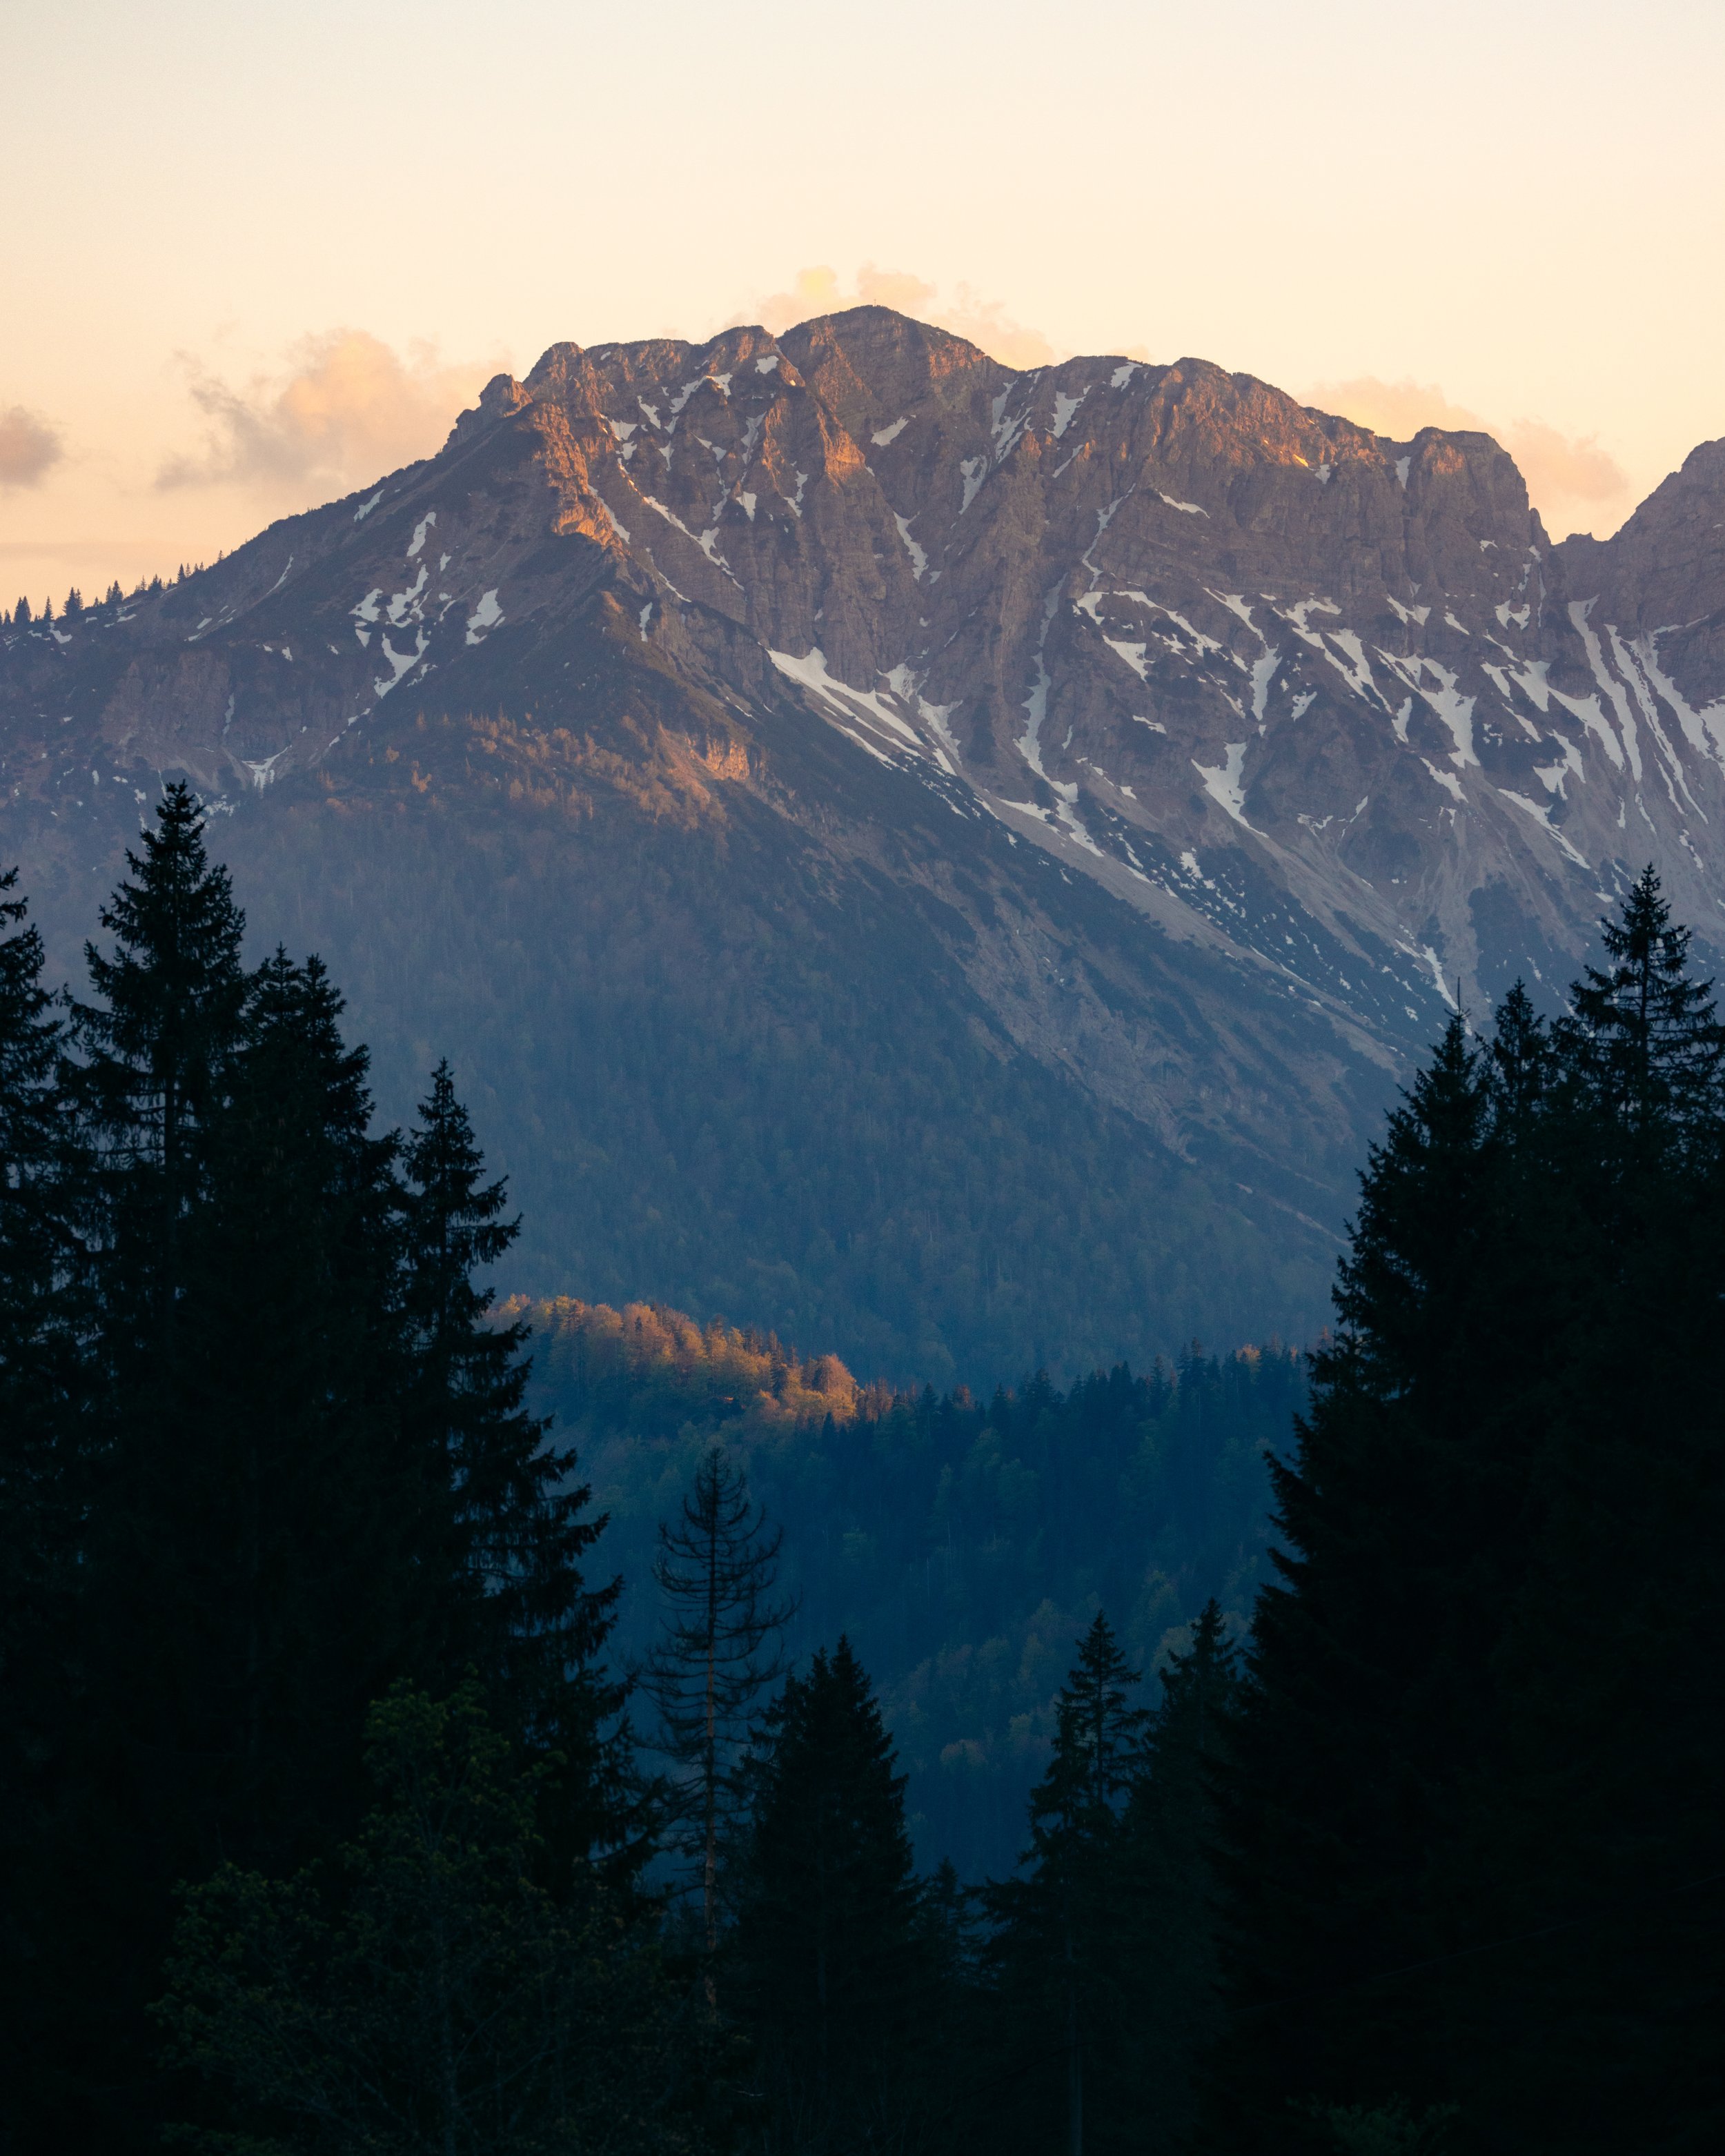
The same picture, just before the blue hour.
At this point for me, this was essentially the last image of the weekend. However, that night brought the unexpected.
Canon EOS R5 + Canon RF 100-500mm @156mm/ ISO 640 - f/5.6 - 1/640 sec
Alright, before we dive into of how I managed to photograph this spectacle, let's clear up some questions. I’m not a scientist, but I often get bombarded with queries about the stuff I capture through my lens. I reckon it's more fun to snap photos when you get the lowdown on what you're shooting, right? So, here we go!
So, what are northern lights?
The Northern Lights, also known as Aurora Borealis, are a natural light display predominantly seen in the high-latitude regions around the Arctic and Antarctic. This mesmerizing spectacle occurs when charged particles from the sun interact with the Earth's magnetic field. This interaction generates light of varying color and complexity, illuminating the night sky with an ethereal glow.
How do solar storms affect the visibility of the Northern Lights?
Solar storms, also known as geomagnetic storms, can greatly affect the visibility of the Northern Lights, or Aurora Borealis, across the world. These storms occur when there is a large expulsion of plasma from the sun, known as a coronal mass ejection (CME). When the charged particles from a CME reach Earth, they can cause a disturbance in the Earth’s magnetosphere known as a geomagnetic storm.
This storm can increase the intensity and reach of the Northern Lights, allowing them to be seen much farther from the poles than is typical. This is because the increased number of charged particles interacting with the Earth's magnetic field leads to more intense and widespread auroral activity. So, even places that are usually too far from the poles to see the Northern Lights, like Germany, can experience this natural wonder during a strong solar storm.
Why do northern lights appear in green, purple, and red colors?
The colors of the Northern Lights, or Aurora Borealis, are influenced by the type of gas particles colliding with the solar particles and the altitude at which these collisions occur. The most common color, a brilliant yellow-green, is produced by oxygen molecules located about 100 km (60 miles) above Earth. Rare, red auroras are produced by high-altitude oxygen, at heights of up to 320 km (200 miles). Nitrogen produces blue or purplish-red aurora.

Green Northern Lights at Kirkjufell, Iceland
Here you can see the use of a lower ISO than in the photos taken in Germany. In this image, the mountain is illuminated by the full moon, providing more light. This allows for greater visibility of the landscape, but less of the northern lights.
Canon EOS R5 + Canon RF 15-35mm @21mm f/2.8 L IS/ ISO 2000 - f/2.8 - 2.5 sec
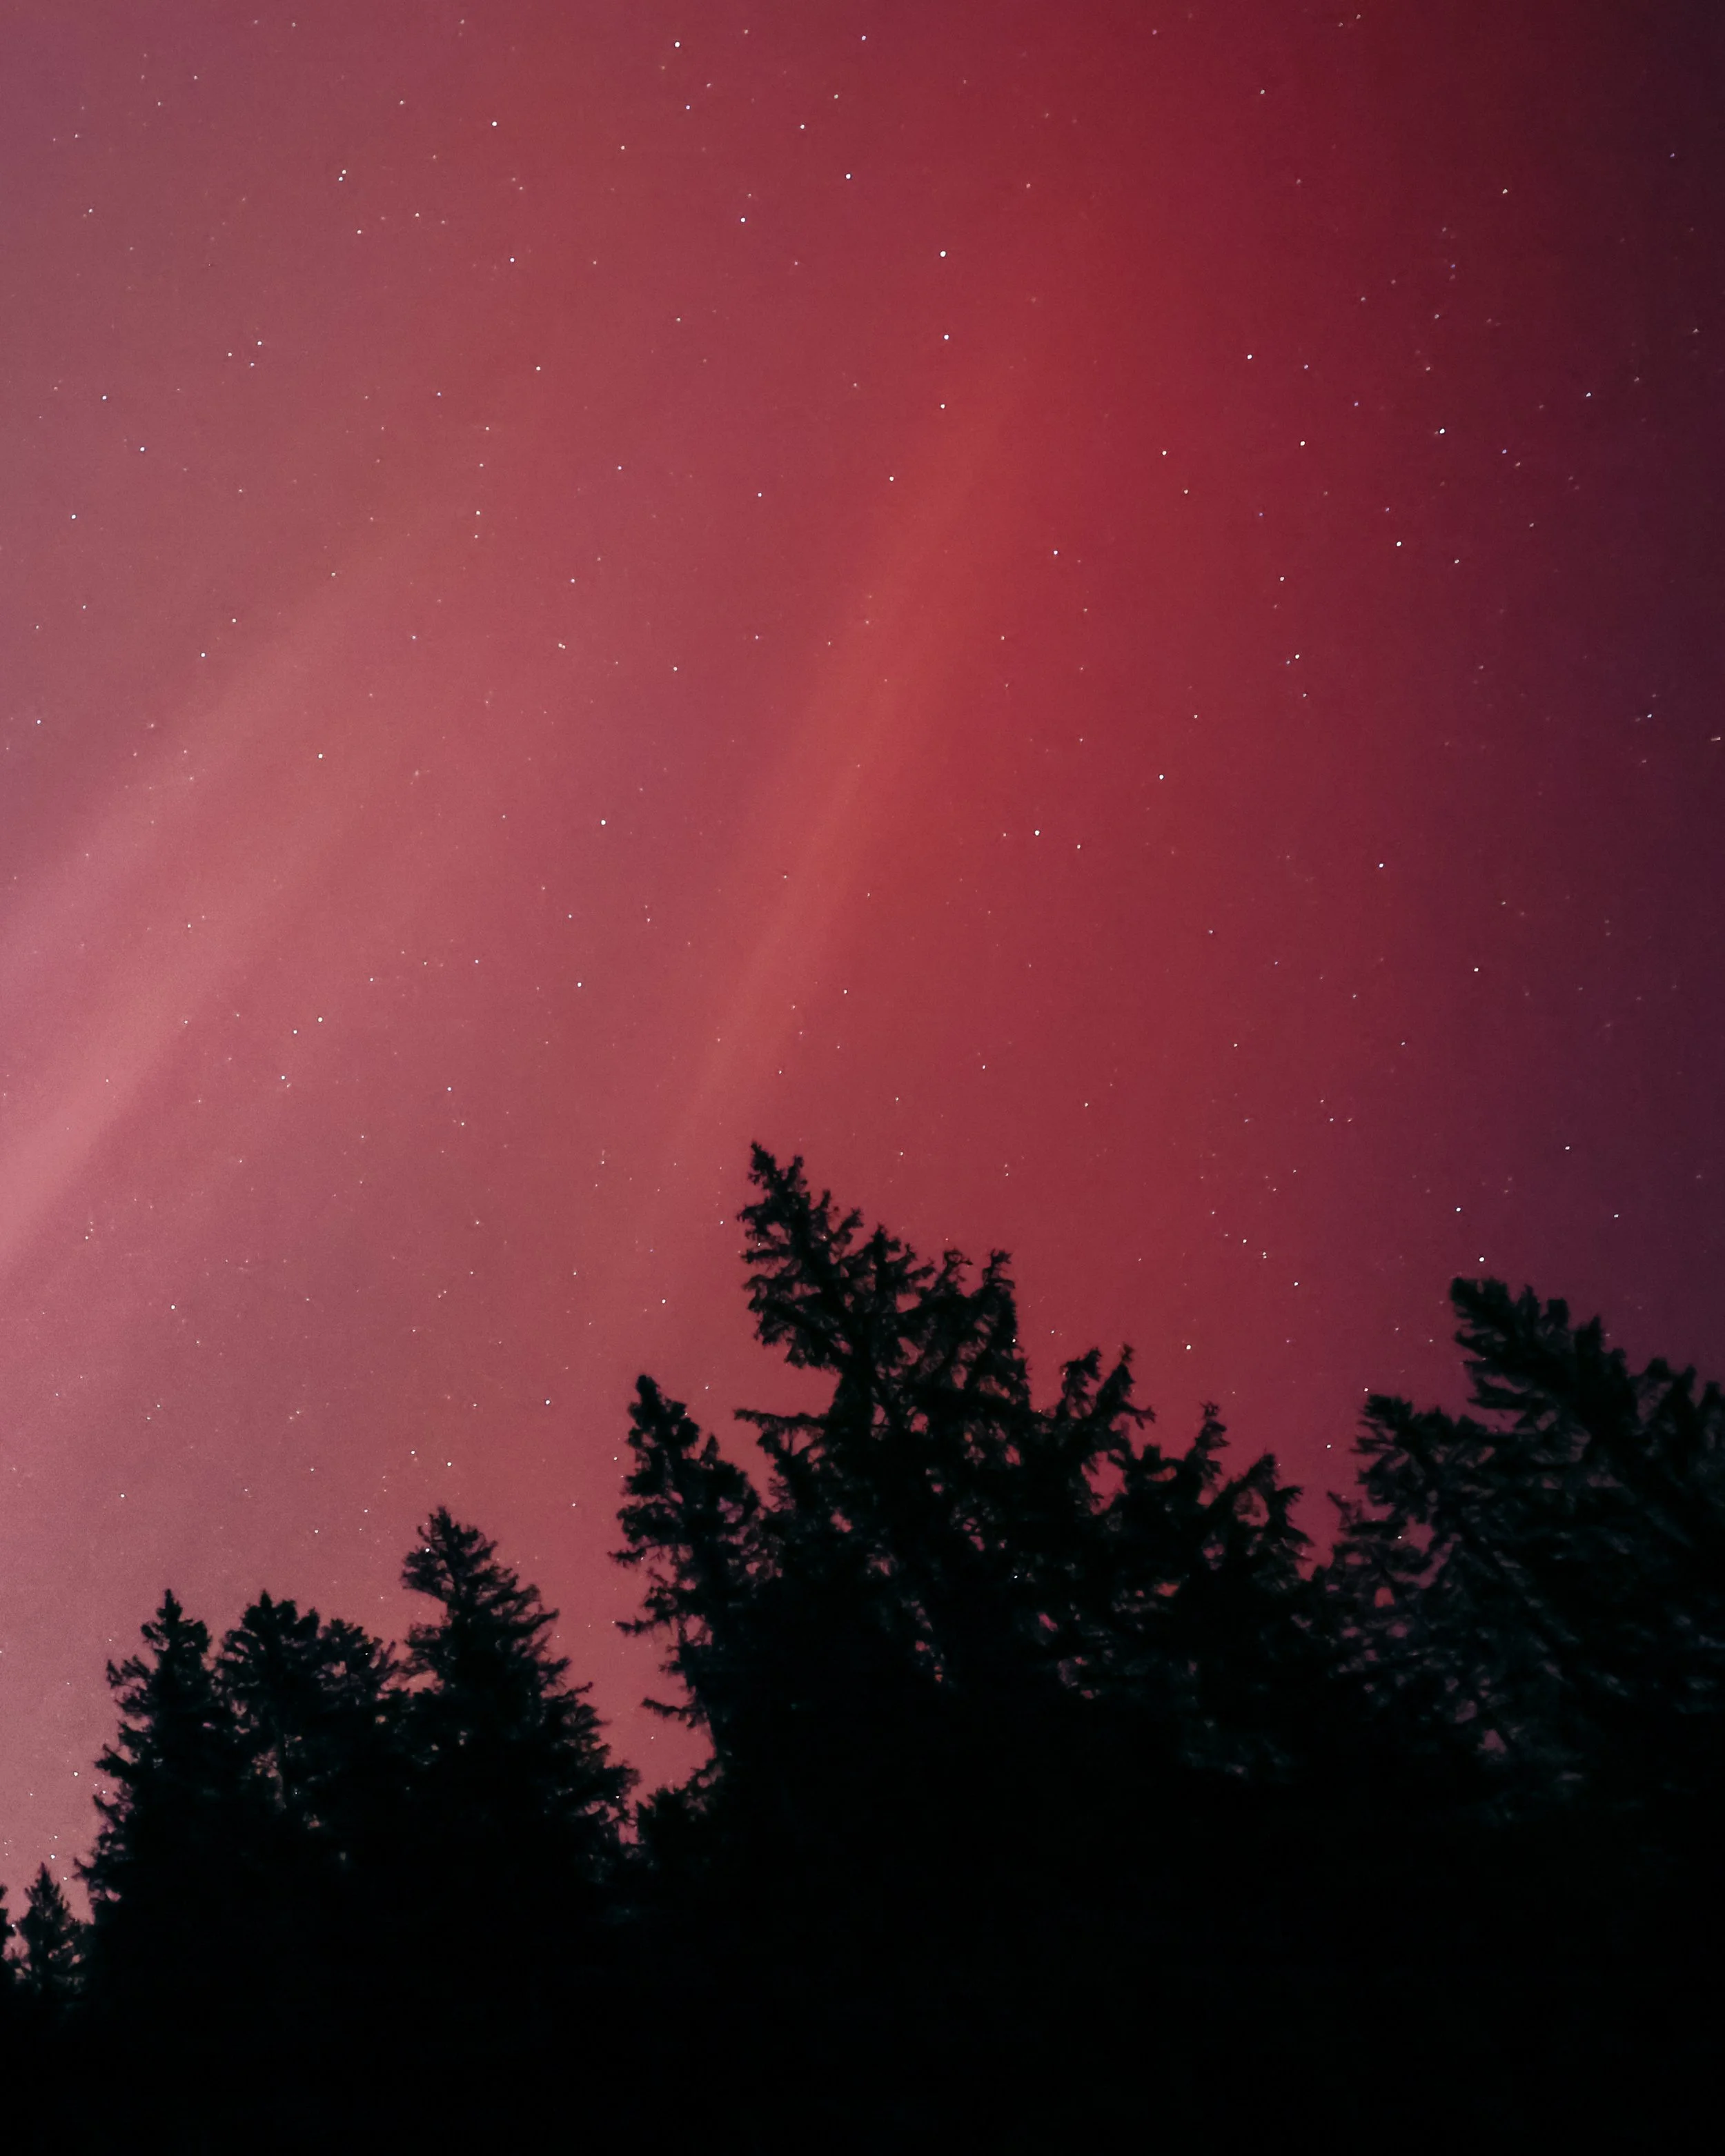
Red Northern Lights in Bavaria, Germany
The color of this northern lights indicates that the oxygen particles that collide with the solar particles are at a very high altitude (220km or around 300 miles) causing the red color.
Canon EOS R5 + Canon RF 15-35mm @21mm f/2.8 L IS/ ISO 8000 - f/2.8 - 2.5 sec

Purple and Yellow Northern Lights in Bavaria, Germany
The color of this northern lights indicates that the oxygen particles that collide with the solar particles are at a low altitude causing the yellow color and the presence of nitrogen causes the purple color.
Canon EOS R5 + Canon RF 15-35mm @35mm f/2.8 L IS/ ISO 8000 - f/2.8 - 2 sec
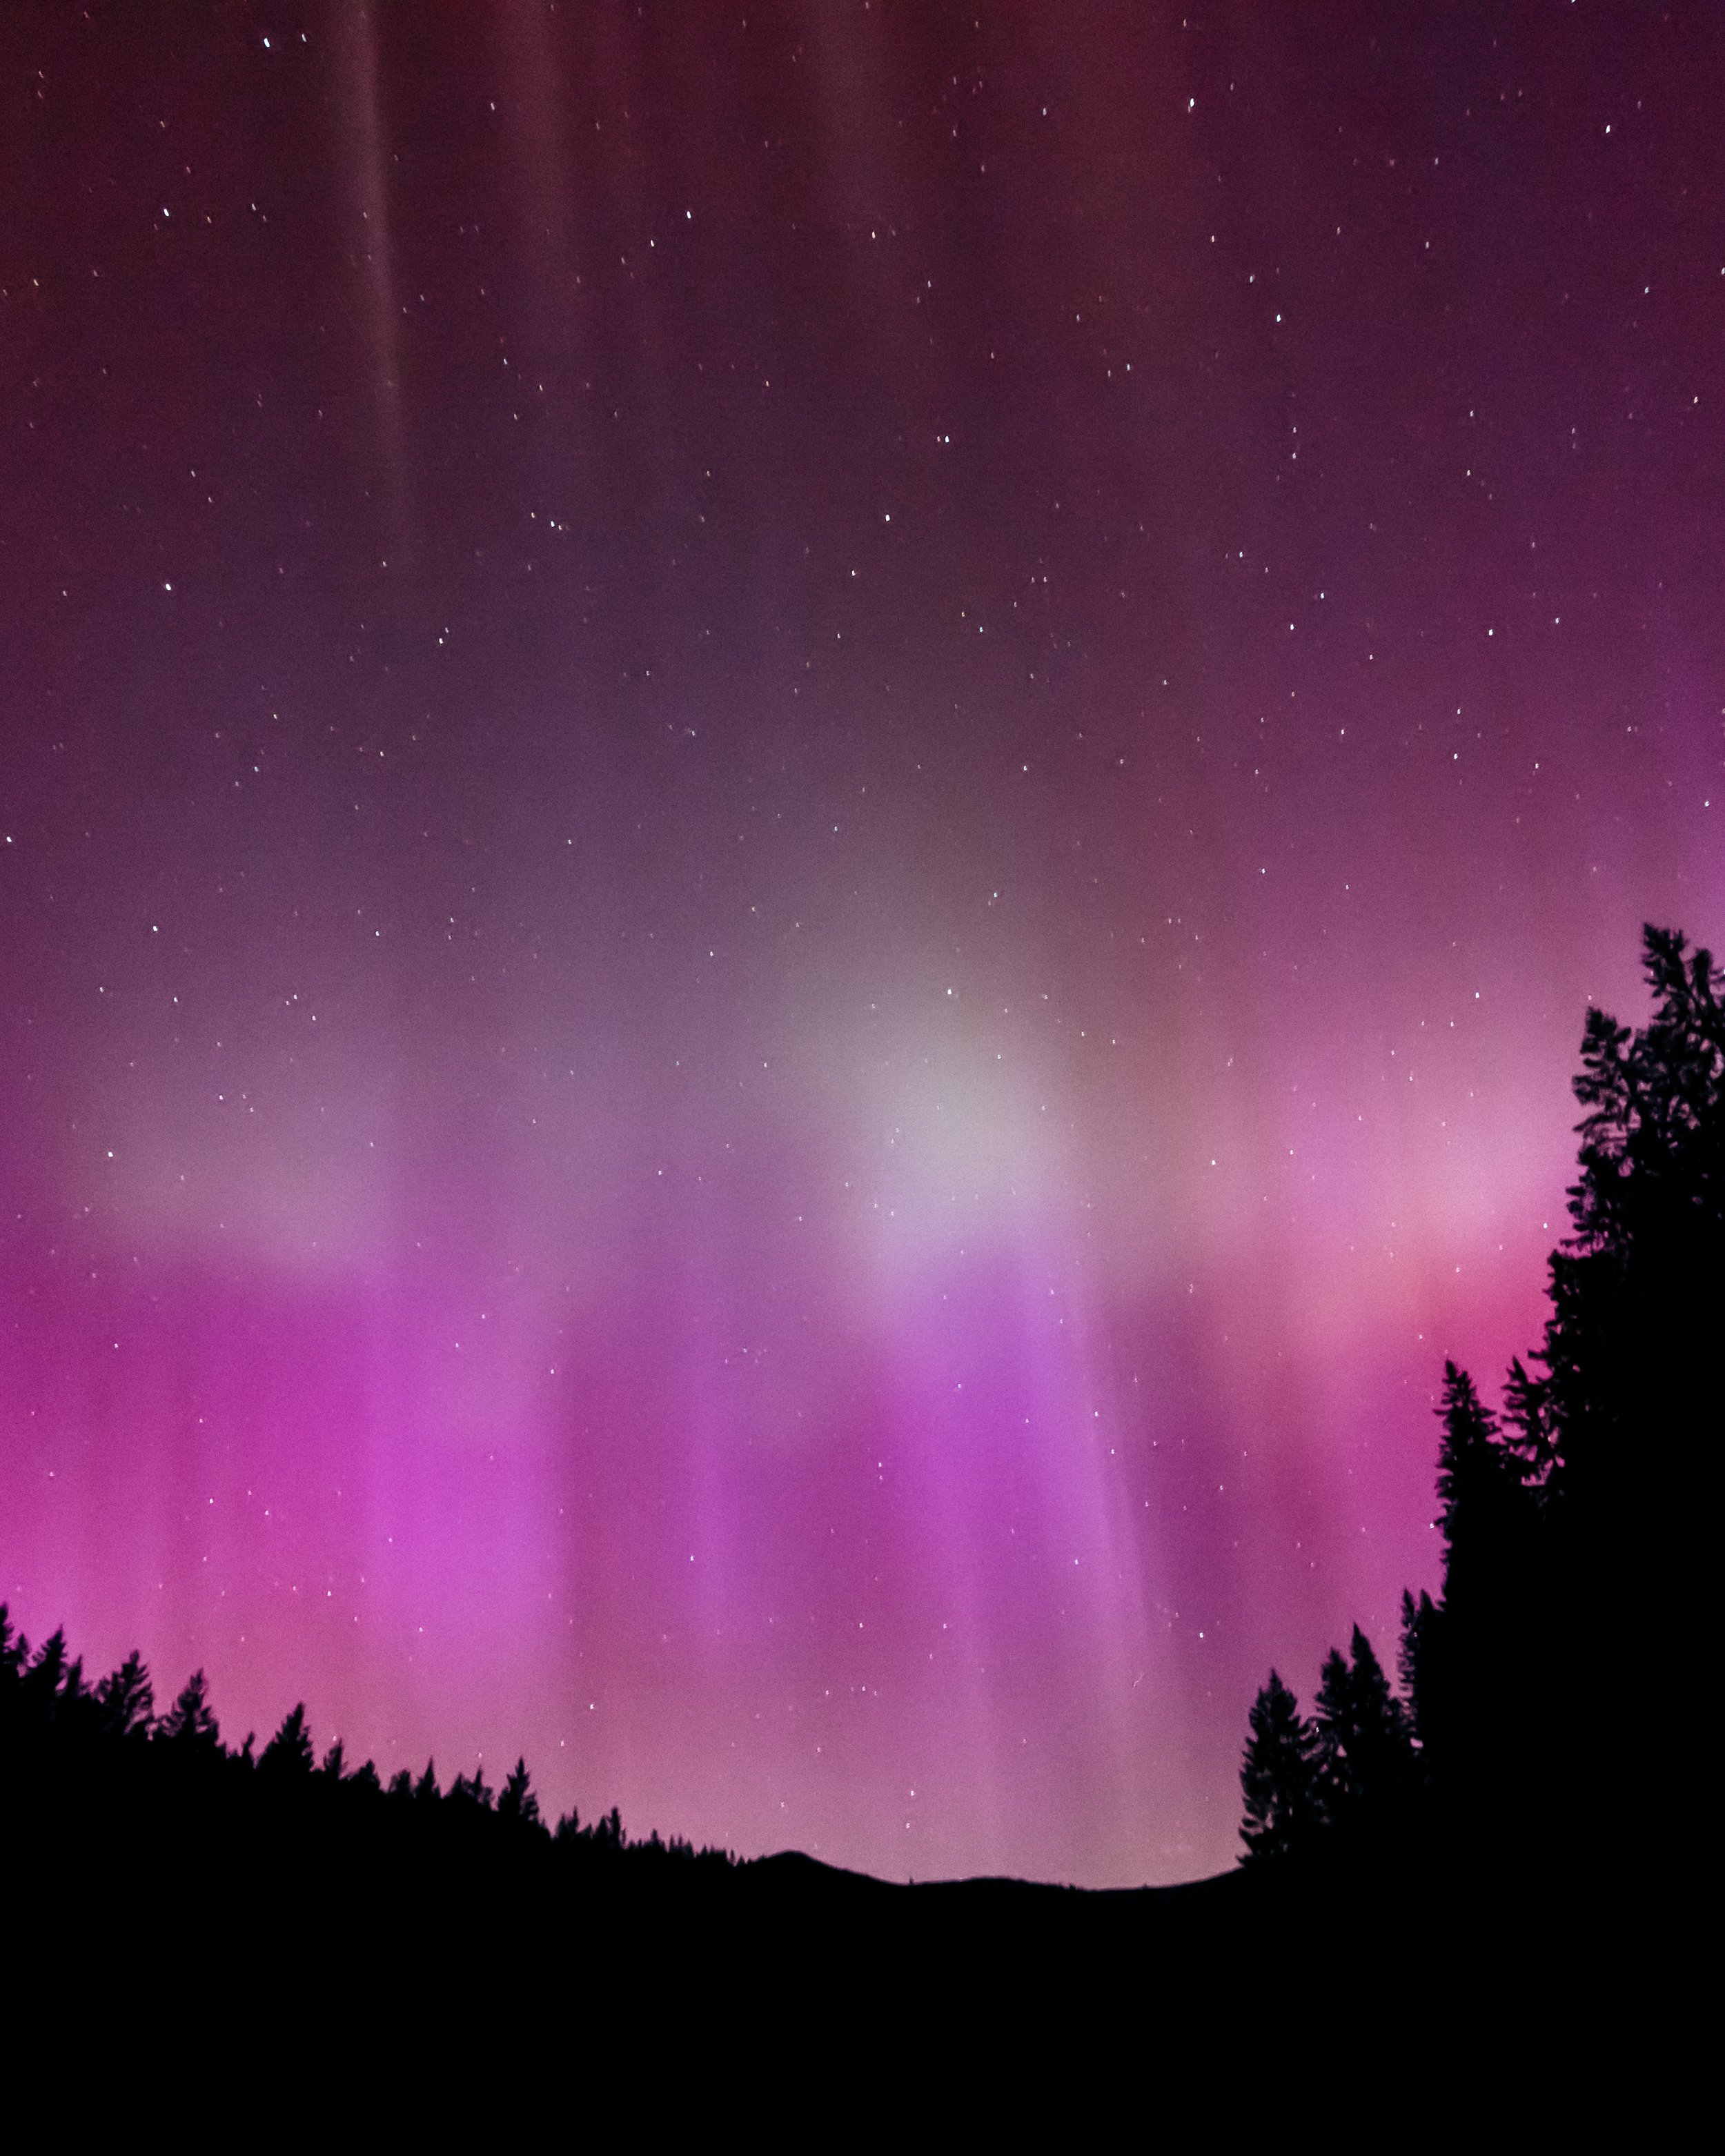
Purple and Green Northern Lights in Bavaria, Germany
In this case, compared to the previous photo, the oxygen particles rise in altitude and become greener.
Canon EOS R5 + Canon RF 15-35mm @15mm f/2.8 L IS/ ISO 8000 - f/2.8 - 2 sec
How to Photograph the Northern Lights
Photographing the Northern Lights can be a challenging yet rewarding experience. Here are some tips to help you capture the stunning spectacle:
Use a tripod: This is essential to avoid camera shake during the long exposures needed to capture the Northern Lights.
Wide-angle lens: A wide-angle lens will allow you to capture more of the sky.
Manual mode: Your camera's automatic settings may not be suitable for night photography. Set your camera to manual mode and experiment with different settings.
High ISO: A high ISO setting can help capture more detail in low light. However, be aware that a very high ISO can also lead to noisy images.
Long exposure: While an exposure of around 15-30 seconds will allow enough light to enter the camera and capture the details of the lights, it will also make the lights appear more diffused in the image. If you want to capture the specific shape of the Northern Lights, a shorter exposure of around 5 seconds may yield better results.
Focus on infinity: To ensure the stars and Northern Lights are in focus, set your focus to infinity.
Shoot RAW: Shooting in RAW format will capture more detail and allow for more flexibility in post-processing.
Check the weather: Clear skies are essential for viewing and photographing the Northern Lights. Checking the weather forecast can help you plan your shoot.
Patience: Finally, capturing the perfect shot of the Northern Lights requires patience. The lights are unpredictable and can appear and disappear quickly.
How to Photograph the Northern Lights with an iPhone
Though shooting the Northern Lights with an iPhone can be more challenging than using a professional camera, it is possible with the right settings and apps. Here are some steps to help you capture this natural wonder:
Stabilize Your Device: Even with an iPhone, it's crucial to keep your device steady to avoid blurry images during long exposures. Use a tripod that can securely hold your iPhone or place your phone on a stable surface, but avoid taking the picture with your bare hands.
Use the self-timer: The simple act of pressing the shutter can cause your phone to shake, resulting in a blurry image. To avoid this, use the self-timer.
Shoot in RAW: If your iPhone and the app you are using support it, choose to shoot in RAW format. This will provide a higher quality image and more flexibility in editing.
Get Away from Artificial Light Sources: For the best possible viewing and photography experience, try to get as far away from city lights and other artificial light sources as possible. The darker your surroundings, the more vivid the Northern Lights will appear in the sky and in your photographs.